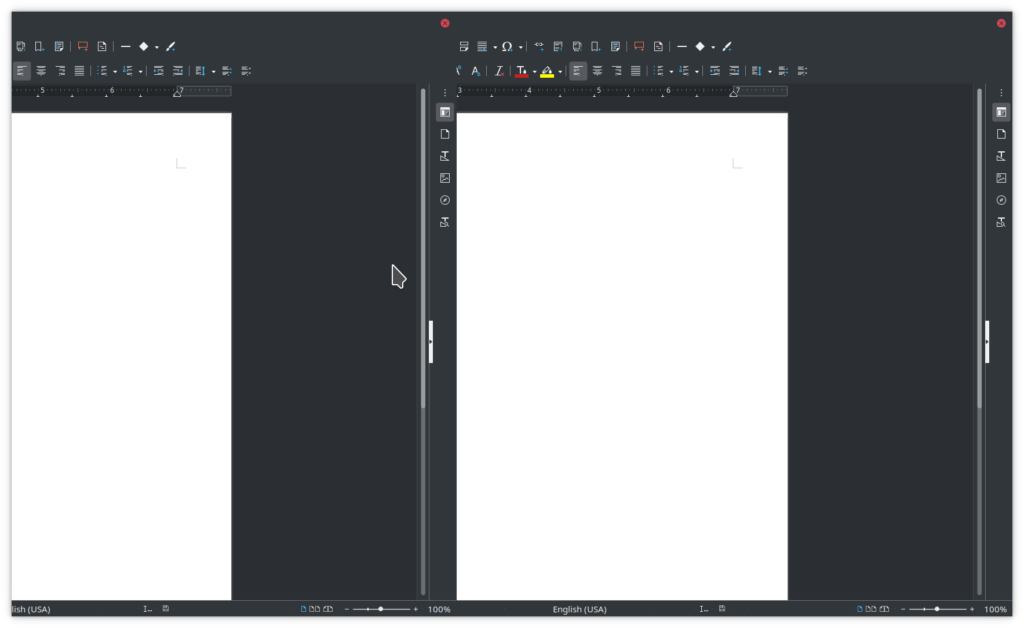
The create a new document function worked a couple times, which is how I got the screen shots for the previous post. But documents touched when things were broken appear to be permanently damaged. They open up broken, and that appears to break LibreOffice so that now the create a new document function opens broken documents too.
Month: September 2021
LibreOffice has been painfully broken on OpenSUSE KDE for a couple months now
And the solution was to install libreoffice-gtk3
I’m rather surprised that it remained so painful for so long. If I were a new user, I’d still be broken.
I don’t know what it takes to figure out that this package should be in the “required” list. Perhaps I installed something else that added GTK3, and now that it’s there, the LibreOffice UI became significantly damaged? Perhaps LibreOffice sees some GTK3 component and then runs as if libreoffice-gtk3 is present?
The result is that every LibreOffice document would open with a split in the middle of the document, and, the main menu was gone.
I had found a document that said that perhaps KDE dark themes were to blame, or were out of date. Man I fouled some things up chasing that wild goose. I also lost some documents I had built, as tried to delete bad configuration files that seemed they might be the problem.
Anyway, if your LibreOffice looks like this:

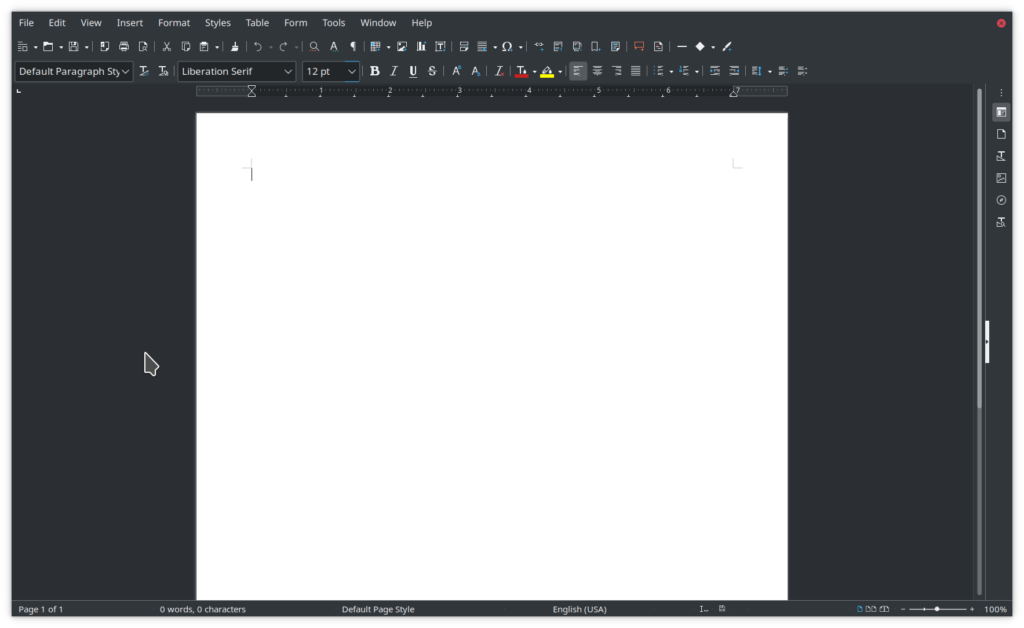
And you want it to look like this (with File menu and everything):

install the libreoffice-gtk3 module.
Raspberry Pi and i3 window manager
I am really liking the combination of Raspbian and i3. I’ve always liked tiling windows; let the computer do the work for me to maximize the screen size of what I can get done. Me messing with window sizes is a waste of my time. Windows got particularly bad when the “tile” function added an extra blank column for people with touch-screens. I don’t have a touch-screen; so why‽‽‽ But I digress.
Novaspirit Tech has a nice video about how to add i3 to Raspbian.
The short form list of steps is:
cd Downloadsgit clone https://github.com/Airblader/i3- So this one turned out to be a little more difficult than it is portrayed in the video, because since then, Git Hub has decided that passwords are bad, and I should have to log in, create a token, and use the token in place of the password. Okay, I jumped through those hoops.
sudo apt install mesonsudo apt install dh-autoreconf libxcb-keysyms1-dev libpango1.0-dev libxcb-util0-dev xcb libxcb1-dev libxcb-icccm4-dev libyajl-dev libev-dev libxcb-xkb-dev libxcb-cursor-dev libxkbcommon-dev libxcb-xinerama0-dev libxkbcommon-x11-dev libstartup-notification0-dev libxcb-randr0-dev libxcb-xrm0 libxcb-xrm-dev libxcb-shape0 libxcb-shape0-devcd i3mkdir build; cd buildmeson ..ninjasudo ninja installcd /etc/xdgcd lxsessioncd LXDE-pi- One quibble I have with this video is that using tab completion is a good thing, and this step was an excellent opportunity to demonstrate it. Essentially, we have done
cd /etc/xdg/lxsessionand now would be the right time to doll- Well, I do
llbecause I have set up an alias forls -l - There are two directories listed, and both begin with “LXDE”
cd(space) and just hit the tab key is the answer here. The result is the same as typingcd LXDE(without hitting the Enter key). If the plain LXDE directory was the right one (it is not) I could just hit the Enter key. Since it is the other one I want, I type the next character (the dash) and hit the Tab key again. Then I hit Enter. I never had to hit the Shift key to get to that uppercase L for LXDE. The computer did the work for me.
- Well, I do
- One quibble I have with this video is that using tab completion is a good thing, and this step was an excellent opportunity to demonstrate it. Essentially, we have done
- Edit both desktop.conf and autostart
- Near the top of desktop.conf, change
window_manager=i3then save and exit. - In autostart, comment out @lxpanel and @pcmanfm, then save and exit.
- Near the top of desktop.conf, change
sudo reboot- On start, you will be prompted to configure i3. Yes, generate a config
- Pick your modifier key. I do like the key on the left between Ctrl and Alt. I also like the little stickers that put a proper penguin over the Winders logo. I’m going to write this as
$modalthough the $ is not typed; it is just an indicator that whichever key is the the modifier key is variable and can change depending on your choice. sudo apt install i3status$mod+shift+rfor restart i3- This gets us the i3 status line at the bottom.
sudo apt install dmenusudo apt install roficd .config/i3- because of the reboot above, we started in our home directory. .config is a hidden directory (because of the leading dot in the file name). i3 is the sub-directory underneath, where the file config exists.
- edit the file config
- There is some good instruction in the video here about checking out which keys do what. For example, seeing that
$mod+Enterlaunches a terminal is important; ditto$mod+dlaunches drun (which is apparently desktop run ?)$mod+arrow keys switch the focus between active windows.
- Find your way to
bindsym $mod+d exec --no-startup-idand replace the enddmenu_runwithrofi -show drun -width 400 -lines 5 - Save and exit config
$mod+shift+rto restart i3- Now
$mod+dbrings up a searchable list of things to run (like Firefox).
- Now
- There is some good instruction in the video here about checking out which keys do what. For example, seeing that
And now I have a beautiful set up to install WordPress on my Raspberry Pi. I’ve got a terminal side-by-side with the web browser instructions, and I didn’t have to mess with screen sizing at all. The windows are as useful as possible, and the computer did that work for me.
I may have enjoyed this somewhat more than normal because of also listening to Noisestorm on YouTube. 😀