The more I use OpenSuSE, the more I wish I was on something else

I recently did an “upgrade” from OpenSuSE Leap 15.3 to 15.4. As expected, it did not go well.

I ended up doing a manual install (as if the disk were new, except for /home), and then re-installing every application I need. Thankfully, there aren’t that many I need.

But I didn’t add any weird repositories. Today I happen to need to use Audacity. Hmmm. The version on this machine is 2.2.2 The current version is 3.3. Well that would explain why the Noise Gate plugin isn’t present.

I did add some weird repository to get the latest version (there appear to be seven of the them). Nope. Doesn’t work.

I happen to be running NextCloud. Every time I start the machine, it warns me that the desktop client is out of date. Okay, I’d like to add a repo please. Nope. Only manual installs, like the uncivilized practice, are what is done here.

I suspect that repositories are considered difficult, so the decicion was to do away with them over time: let programmers define flatpaks and snaps, instead. I kinda hate flatpaks and snaps; but, what I’ve got here isn’t working, either.

Another new irritating thing is that I use “focus follow mouse”. Every time I’m on a Windows machine (one day a week), I’m reminded how nice it is to wave the mouse over the screen I want to work on, and that’s the window with current focus. Lately, however, this stops working after a while. Time to reboot. What is this, MS Windows?

Did I mention that about four times in the last three weeks (out of multiple times a day), the power down function doesn’t? It appears to go mostly down, but leaves the motherboard running. I’m trying to save electricity here, since rates went way up, and if I’m not using the machine, there is zero good reason to be burning electricity wastefully. Power up takes less than 20 seconds, so why not?

Well, because sometimes the machine doesn’t go fully down. I later want to power it up, but it’s locked up in the mostly-down state. I have to go to the back of the machine and flip the switch on the power supply. That could just be a Linux thing instead of OpenSuSE thing, though.

Was somewhat forced into Ubuntu Snapper, and now kernel stuff is broken

I wasn’t fond of the idea using Snap, but I recognize that might be my dislike of change speaking. I needed to add a domain name to my Let’s Encrypt SSL certificate, and all signs said to install the Snap version of Certbot. Okay, maybe I’m in the wrong, and should just get with the program.

And now since adding Snapper to my Ubuntu machine, every time I go to update packages to keep things up-to-date security-wise, I get a kernel upgrade warning that always fails to install. Thank you, Snapper folk, for breaking my system. I so very much appreciate adding your stuff and creating trouble in my life. Don’t know where I’d be without you.

All that really happens is that after every update, I get “Pending kernel upgrade” “Newer kernel available”

“The currently running kernel version is 6.1.10-x86_64-linode159 which is not the expected kernel version 5.15.0-73-generic.”

“Restarting the system to load the new kernel will not be handled automatically, so you should consider rebooting.” Thank you. Do you have any more ideas that don’t work? I’ll try those too.

I suspect that because the running kernel is newer, it’s just some entry somewhere that says I’ve got an older version installed. Nothing I easily found told me where to fix that though.

All I’m really doing is complaining that I didn’t have this problem prior to installing Snapper to support the Let’s Encrypt certbot.

2024-08-10 – I finally got this fixed a couple of weeks ago. Looks like I did:

dpkg uname -a
grep ^deb /etc/apt/sources.list
cat /etc/*release
sudo apt -s install linux-generic-hwe-22.04
sudo apt install linux-generic-hwe-22.04
sudo apt -s purge ?config-files
uname -a
reboot now 

OpenSuSE upgrade did not work – reinstalled fresh from a new ISO

Pro-tip you should have done a decade ago: add a second hard drive to your machine, and put /home on it. Then during the install of the fresh OS, do not format that disk, simply mount it as /home

In a previous post, I was whining that YouTube videos were not working. I also (rather mean-spiritedly) implied that maybe Google was screwing with the connection because I was looking for ad-blocking videos. That was wrong: this fresh install of OpenSuSE has fixed that problem.

Of course, never does a single thing change, and I happened to roll over into the new month, so T-Mobile doesn’t see me as over my “unlimited” transfer limit.

But for all that testing I did, what I hadn’t tried was Windows versus Linux. I saved off a problematic YouTube link to my NextCloud Tasks, and logged in to it on a Windows machine. It played perfectly.

D’oh! It’s my OpenSuSE machine that’s borked.

I’d done an Upgrade per SDB: System upgrade to Leap 15.4

So I downloaded the ISO and did an Install not an Upgrade, and now that problematic YouTube video plays correctly.

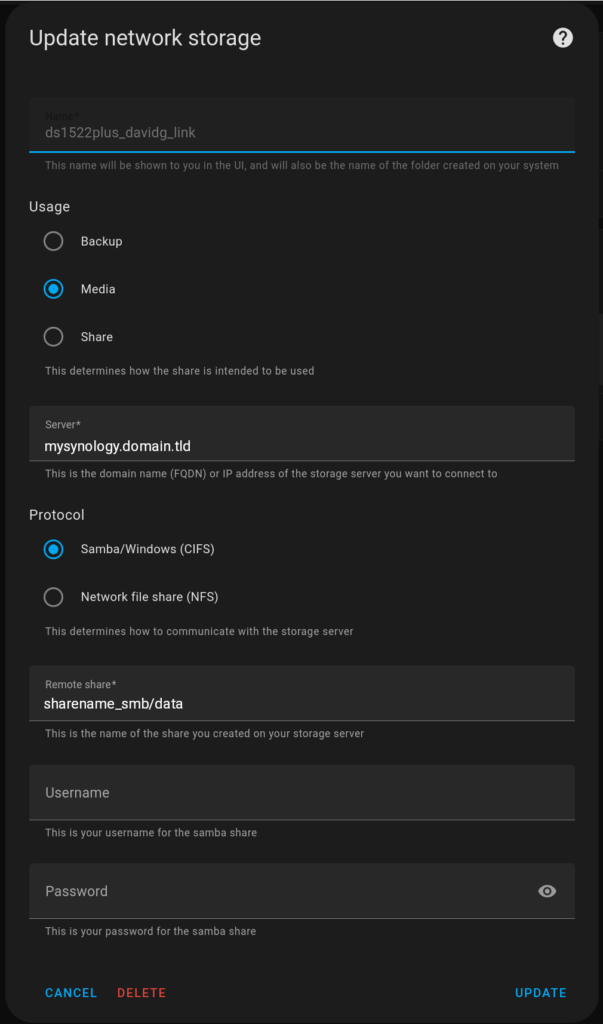
I’m still going to have to install all the packages that went away. But that is a trade-off I’m willing to make, for being able to see videos of how to open up the connection to Mariadb running on a Synology NAS (for example).

Rename audio files to just their titles

Another exiftool operation: suppose you have a bunch of files named something like this:

01 - String Quartet in B flat Major, 1st movement "Allegro".ogg
02 - Sonata, K. 310, 1st Movement (Mozart - Alfred Brendel).ogg
03 - Asturias_Leyenda (Albeniz - Alirio Diaz).ogg
04 - Massenet: Meditation from Thais (Mischa Elman).ogg
05 - La Coulicam - Rondement (Rameau - Harnoncourt, Lars Fryden).ogg

11 - Sonatine en trio "Modere" (Ravel - Orpheus Trio).ogg
12 - Preludes - La cathedral engloutie (Debussy - Sviatoslav Richter).ogg
13 - Eili, Eili (Mischa Elman).ogg
14 - Simple Fugue (Gr. 1, D. 1) (Bach - Gustav Leonhardt).ogg
15 - A Felicidade from Black Orpheus (Paula Robison).ogg

But really, you want the files to just be named after the Title of the song. You don’t want the leading track number, and if there are any characters in the file name that would cause Windows heartburn (like slashes, colon, asterisk, question mark, etc.), you would like those stripped out too. For example: Massenet Meditation from Thais (Mischa Elman).ogg

Here’s a handy command:

exiftool '-Filename<${Title;}.%le' *.mp3

So we have exiftool which is the utility that does the work. Thank you to Phil Harvey for doing the work to make this easy.

Then we have two parameters:

'-Filename<${Title;}.%le'

*.mp3

The second parameter says to work on files with the filename extension of .mp3

The first parameter breaks down like this:

-Filename<

Note that the non-change-making version is -Testname< (for testing, obviously)

-Filename tells exiftool that it will be updating the file name. The < symbol says that the replacement for the file name will be incoming from the rest of the parameter.

What follows after the < has two pieces: ${Title;} and .%le

${Title;} is the processed text from the metadata variable Title. The leading $ and the { and } with the ; before the closing curly brace serve to strip out any invalid characters found in the title that wouldn’t work as a file name.

.%le appends a file name extension. Technically, .%e is the file name extension, but adding the l makes it lowercase. So we get the Title as the first part of the file name, and the last part of the file name is .mp3 (because we told exiftool only to look at .mp3 files).

exiftool to playlist file

Assuming that you are currently in the subdirectory with music files, and those files are of type .ogg and you want to create a playlist file named _great.m3u which contains the names of the songs with “World of Warcraft” in the album name, this one liner creates such a file:

exiftool -p '$filename' -if '$album =~ /World of Warcraft/' *.ogg 2> /dev/null > _great.m3u

Assuming that you then wanted to add the files of type mp3 from the artist E.S. Posthumus, this one liner adds to that file:

exiftool -p '$filename' -if '$artist =~ /E.S. Posthumus/' *.mp3 2> /dev/null >> _great.m3u

Assuming that you then wanted to add files of type mp3 with the Genre of “Classical”, this one liner adds these to that file:

exiftool -p '$filename' -if '$genre =~ /Classical/' *.mp3 2> /dev/null >> _great.m3u

Assuming that you then wanted to add files of type mp3 with the Comment of “VIVA EL PRESIDENTE!”, this one liner adds these to that file:

exiftool -p '$filename' -if '$comment =~ /VIVA EL PRESIDENTE!/' *.mp3 2> /dev/null >> _great.m3u

exiftool is the wonderful utility written and maintained by Phil Harvey

-p '$filename' prints the file name. We later strip off the other stuff by redirecting stderr to null. That’s the 2> /dev/null part.

-if '$album =~ /World of Warcraft/' and -if '$artist =~ /E.S. Posthumus/' are matches against a regular expression. =~ says we are doing a match and the text between the slashes are what need to be present for the match to report true.

> _great.m3u overwrites the existing file, but then >> _great.m3u appends to it.

Care to guess who purchased the collector’s editions of some of the games so I could get a CD of the game music (or files from Steam)?

One thing (I don’t know that it’s a problem, really) is that Artist =~ /E.S. Posthumus/ will find the same file as Genre =~ /Classical/ so the same songs end up in the playlist twice. Maybe I just like E.S. Posthumus so much that I want their chance of being picked by the shuffler better than average. 😉

But if that’s not your bag, this will make a new file (with a new name) which contains only unique song file names:

sort _great.m3u --unique --output=_great-unique.m3u

If you happen to have your own Nextcloud with the Music Player app, you can import this _great-unique.m3u file directly into a new playlist.

Linode base to LVM conversion

In my last post, I whined that I couldn’t find a how-to on how to convert a Linode virtual machine to an LVM setup. Well, I’ve done it, so I should write this up, no?

I didn’t want the machine to have a swap partition; so there were three things to do:

  1. swapoff while logged on, inside the machine
  2. Edit /etc/fstab to delete the line for the swap drive
  3. Outside the machine in the Linode manager, delete the disk
    • So first I had to power the machine down
    • Then in the Linode virtual machine manager, I had to switch to the Storage tab
    • Now I can click on the swap drive and delete it.
      • I don’t know why, but WordPress is being stupid with lists, which it didn’t used to prior to the most recent “upgrade”. This sublist is supposed to be numbered, damnit. And this particular list item was supposed to be indented even further.

The next thing to do was to shrink the existing disk. I do not know if I could have just done that. I see a resize option in the Linode storage manager. It may be that they have cloud-init wired in, and using the resize button would also have run stuff inside the machine to make everything nice. That’s not the way I went. 🤷

In the Linode manager (at the upper level, where you can see all your virtual machines), there is a three-horizontal-dots menu button. (I don’t know what is the good name for this button. I like the three horizontal lines, stacked, menu buttons because I can call it a hamburger button, and people get the idea of a bun with a patty in between. But I digress.)

I clicked on the three-horizontal-dots menu button, and chose the Rescue mode menu option. This powers down my virtual machine and attaches it as storage to a rescue mode virtual machine (running Fennix). Then in the Linode manager, I used Launch LISH Console to spawn a new web page which is the remote console into the Fennix machine. Although I’m inside the Fennix machine, /dev/sda is still my virtual machine’s main disk. It is not mounted at this time, which is good. So then I ran the command to shrink /dev/sda with resize2fs /dev/sda 9G

So a very real problem with me writing this up is that I don’t have a history command to verify this is what I did. That history was recorded in the Fennix virtual machine which is destroyed after reboot. I’m pretty sure the command was resize2fs /dev/sda 9G but I don’t actually know. When I look stuff up now, it looks like resize2fs applies to the partitions inside a disk device rather than the device itself. But I’m pretty sure I did this.

Then, using the Linode manager, I did shrink the disk. So the next steps were:

  1. Reboot out of rescue mode (wait for everything to boot back up)
  2. Power down the virtual machine (wait for it to shut down)
  3. In the Linode manager of my virtual machine, resize the one-and-only disk to 9 GB
    • The base machine had used about 5 GB of the 25 GB allocated. This leaves another 4 GB free disk space, even prior to moving /var off to another disk.
  4. Then, I added four disks:
    • home
    • tmp
    • var
    • var/mail

Of course, when I added these disks, I had to pick the sizes of what I wanted each to be.

The next part of the puzzle wasn’t obvious either: how does Linode map these newly added disks to the virtual machine? The answer is that by default, it does not.

That’s over in the Configuration tab of the virtual machine manager. (Earlier documentation appears to have called this the Profile tab). Doing an edit of my virtual machine, I could pick the /dev/sdX and assign it to the disk I had created for my purpose.

Okie dokie, time to power up and do the LVM stuff.

Create the physical volumes: pvcreate /dev/sdb /dev/sdc /dev/sdd /dev/sde

Create the volume groups:

vgcreate vg_mail /dev/sdb
vgcreate vg_tmp /dev/sdc
vgcreate vg_home /dev/sdd
vgcreate vg_var /dev/sde

Create the logical volume groups:

lvcreate vg_mail -l 100%FREE -n lv_mail
lvcreate vg_tmp -l 100%FREE -n lv_tmp
lvcreate vg_home -l 100%FREE -n lv_home
lvcreate vg_var -l 100%FREE -n lv_var

So at this point, we have logical volumes, inside of volume groups (which have physical devices assigned). LVM makes this storage available at /dev/mapper

Format the new storage:

mkfs.ext4 /dev/mapper/vg_mail-lv_mail
mkfs.ext4 /dev/mapper/vg_tmp-lv_tmp
mkfs.ext4 /dev/mapper/vg_home-lv_home
mkfs.ext4 /dev/mapper/vg_var-lv_var

Now comes the tougher part, moving the new storage into production.

The process is to shut down the system to Init Level 1 (so that as little as possible is currently running), mount the new storage, copy the files over, rename the old storage out of the way, and then update the /etc/fstab to reflect the new storage mount point.

Inside the running virtual machine, I gave the command init 1

Now I have to use the Linode virtual machine manager Launch LISH Console to get logged into the running machine (Init Level 1 turns off the network).

mkdir /mnt/newvar
mount /dev/mapper/vg_var-lv_var /mnt/newvar/
cp -apx /var/* /mnt/newvar
mv /var /var.old

Okay, the contents of /var are now inside the LVM logical volume. Now to configure the system to mount that logical volume at the file system mount point /var

First, use blkid to identify the universally unique identifier assigned to the LVM volume. Perhaps blkid says your LVM volume is this:

/dev/mapper/vg_var-lv_var: UUID="epstein-didnt-kill-himself-605169120" BLOCK_SIZE="4096" TYPE="ext4"

Then, edit /etc/fstab to have the UUID entry for the mount point:

UUID="epstein-didnt-kill-himself-605169120" /var ext4 defaults 0 1

Do this for the other LVM volumes and then clean up. Before rebooting, you should try mount -a just to make sure there are no errors; because if there are errors mounting things, that’s going to make the reboot suck, badly.

Cleanup was to delete /mnt/newvar and to delete /var.old (and the other LVM mount points processed the same way).

Kind of hating cloud servers right now

How in the world am I supposed to create LVM (Logical Volume Management) disk layouts on a cloud VM with a single big disk? Before I start piling in data, I want to put /var/mail on it’s own partition.

Maybe it’s just that Google is stupid, and the answer is plain as day if I could find it.

Linode is annoying, because the pages I found said (in essence) “Don’t use LVM, use our attached disks at an additional $2 per disk per month.” Well, I could add a disk and then use LVM to configure it. But that means that I’m going to have a 25 GB /boot partiition and then hardly anything else over on the new disk. What it won’t do is keep the system from going comatose if some process starts spamming a log file and fills the disk. That’s stupid. And I’d be paying $2 a month, forever, for the stupidity.

I want to install LVM so that I have the option of adding another disk later, and it would be super easy. I’ve done LVM at work for years now, and it’s great. But at work, I get to install the machine from a boot ISO, and I get to go through every step of the install. Linode creates new virtual machines from images, where the disk is pre-configured. I don’t get to say I want /home on a separate volume (for example).

Every search I’ve done about LVM has two assumptions behind it: 1) there is a newly added virgin disk, or 2) during install, choose to partition the disk the way you want.

Nothing appears to address the situation where I’ve got a 25 GB disk with 20 GB free, and I’d like to move /home and /var and /tmp to /dev/sda1 /dev/sda2 /dev/sda3

I need to do pvcreate, but it errs out because I don’t have a newly added virgin disk.

I doubt this problem is particular to Linode; I suspect Rackspace and Vultr have the same problem – the preconfigured image is what you get; go kick rocks if you want something else.

It is frustrating, becasue I cannot be the first person on the planet to have thought of this or asked this question. But if the answer is obvious, I’m not finding it with Google search.

I’m not finding Rimworld to be very fun

It got an “Overwhelmingly Positive” score on the Steam store, and I bet for younger players it is great. But I’m old, so my brain does not move as fast as young peoples’ do.

This means I lose a lot. Half of the time I have two of my four man crew in the hospital (the room I set up to be my hospital). Pretty much as soon as people are healthy, the AI throws another rabid schnauser / deer / antelope at my crew.

The AI in this game is supposed to be really good (by reputation I have read). But for me, it never lets up and there aren’t any easier / lower settings I can set. It is simply unrelenting and oppressive.

I want to like this game; I’ve never played The Sims but I imagine this is like The Spacefaring Sims On Another Planet. It has goals and objectives – and it applies pressure to get there. So it’s not bad at all. I also really like that it has a Linux native version. The soundtrack is really good.

There are supposed to be quests in this game, where I send off people to accomplish whatever goal. I lose (or nearly lose) so many rabid animal fights (or malevolent humans) that I cannot afford to send people on the quest. So then I’m told I failed yet another quest.

But if the only thing that ever happens in this game is that my pawns* die often, then I’m going to be sad I spent the money on it.

I’ll try some more; but I hope fun shows up soon.

*that’s what the game calls them.

Putting an image on a Raspberry Pi

  1. Download a .raw.xz file
    1. In this case, it was https://download.opensuse.org/distribution/leap/15.4/appliances/openSUSE-Leap-15.4-ARM-KDE-raspberrypi.aarch64.raw.xz
    2. Yes, I also downloaded the .sha256 file and ran sha256sum against the downloaded image to make sure the image file was not damaged during transfer.
  2. Open a terminal session and become root
  3. Determine which device the SD card is
    1. In this case, it was /dev/sdc
  4. Copy the image file to the SD card
 xzcat /home/david/Downloads/openSUSE-Leap-15.4-ARM-KDE-raspberrypi.aarch64.raw.xz | dd bs=4M of=/dev/sdc iflag=fullblock oflag=direct status=progress; sync