I have the new Bitnami WordPress multisite web server up and running. I’d like to make a backup of it, prior to mucking with it, so that I can revert back if needed.
Schrodinger’s Backups: The condition of any backup is unknown until a restore is attempted.
Murphy’s take on Schrodinger’s Backups: You’re fucked. The backup is dead.
Well, that is often the case when you just lost the computer, and you now need to restore from your “backups”.
Let’s see what it takes to successfully take a Lightsail snapshot and restore to it.
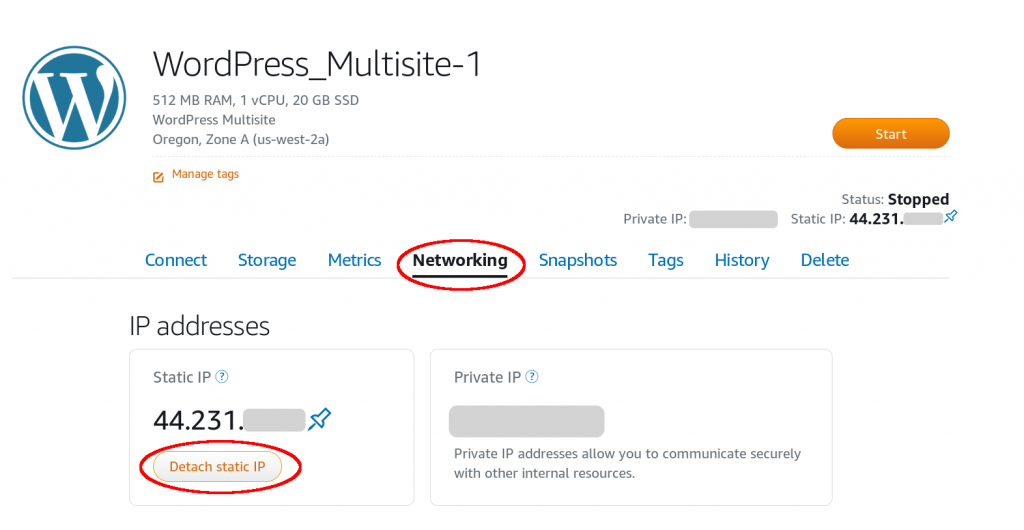
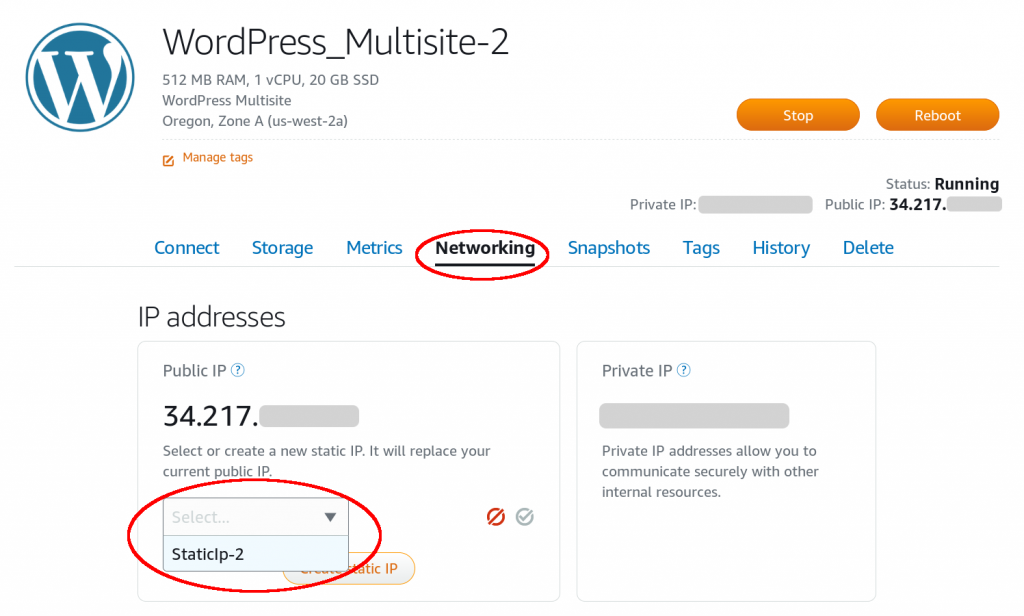
Technically, you spin up a new instance, move the IP address, and delete the old instance. So you will be incurring a little bit more extra charges with Lightsail, because for a little while, you had two instances. Snapshots cost money, too.
Step the first: shut down your instance.
In theory, this step should not be necessary. The snapshot process should work on the running image. It probably will.
In theory, there is no difference between theory and practice. In practice, there is.
Although it is a remote chance, there is a problem of database coherency. What if, at the exact moment you take a snapshot, some database transaction is only half-posted? What if one half of the transaction is written to disk, then the snapshot happens, then the other half of the transaction gets written to disk? When you restore, the database is going to no longer be coherent.
For some databases, there are a whole subset of features and work done to ensure atomic transactions that prevent any piece of the transaction of being committed until all of it can be verified to be done. That’s all nice and everything, but what’s wrong with just shutting down the server? If your server is so mission critical that you cannot have a minute or two of downtime, you should be working on clusters of machines that can announce themselves into the cluster, and announce themselves out of the cluster and gracefully transition between states.
Power down the server, and the server is quiescent with the world.
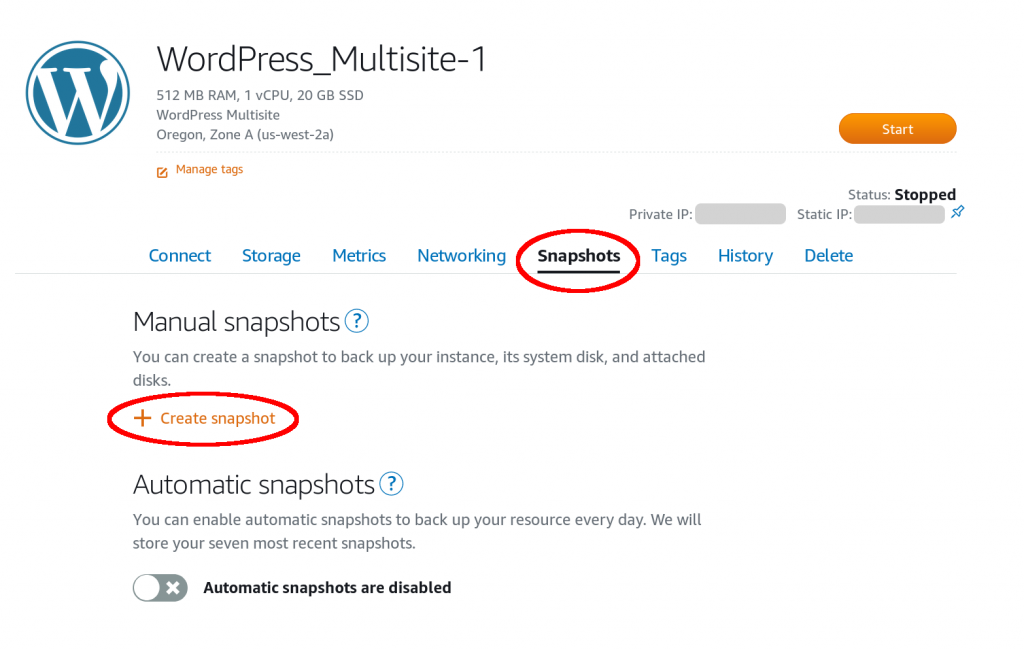
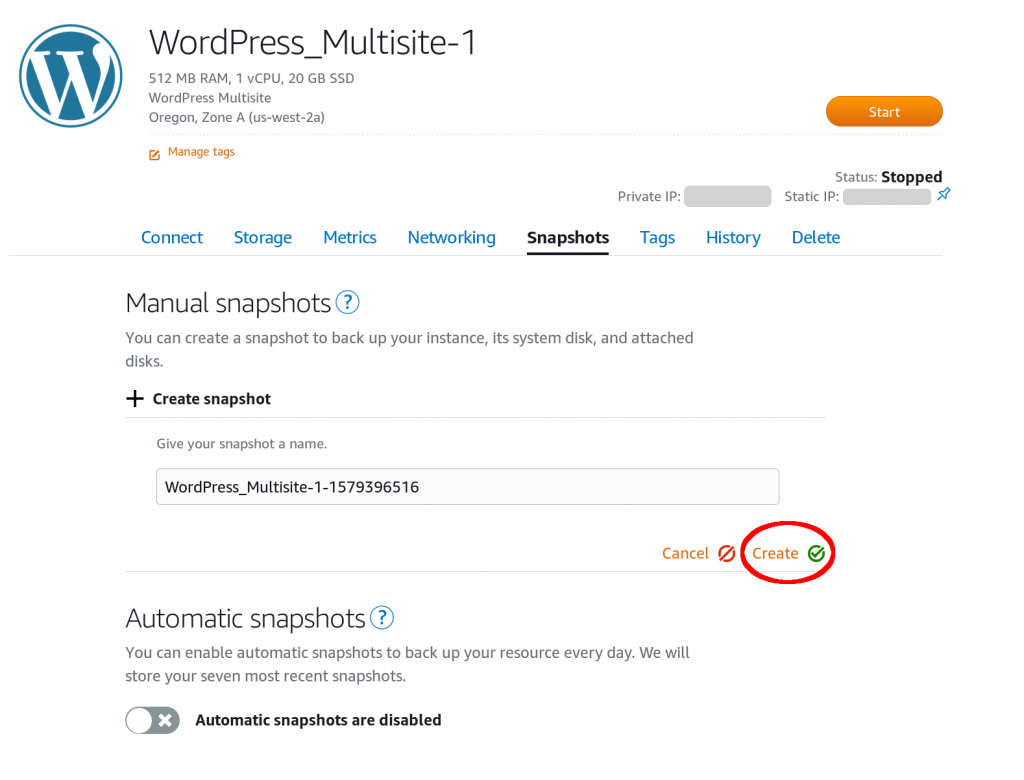
Step the second: take the snapshot.
A picture being worth a thousand words, here’s thirteen thousand words:


Step the third: the snapshot becomes the machine.
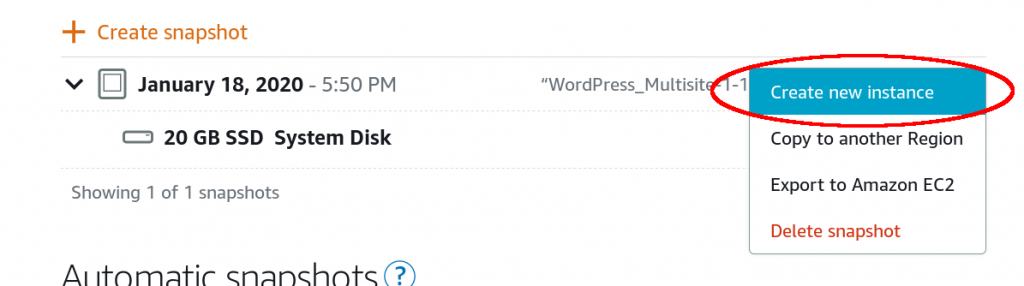
See that big orange Create Instance button? Click it!
I may be a stockholder of Amazon.com stock, and will see revenue slightly rise as you invoke an additional charge on your account. Click it!
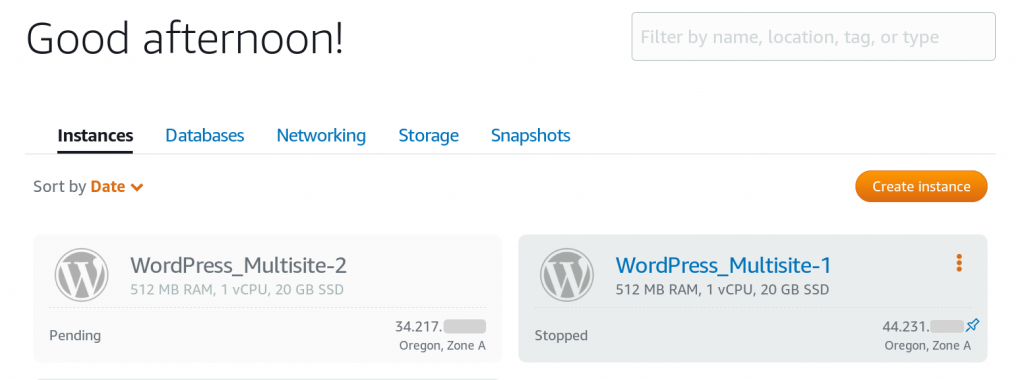
Eventually, the new instance is running. But we still need to move off of the old instance.

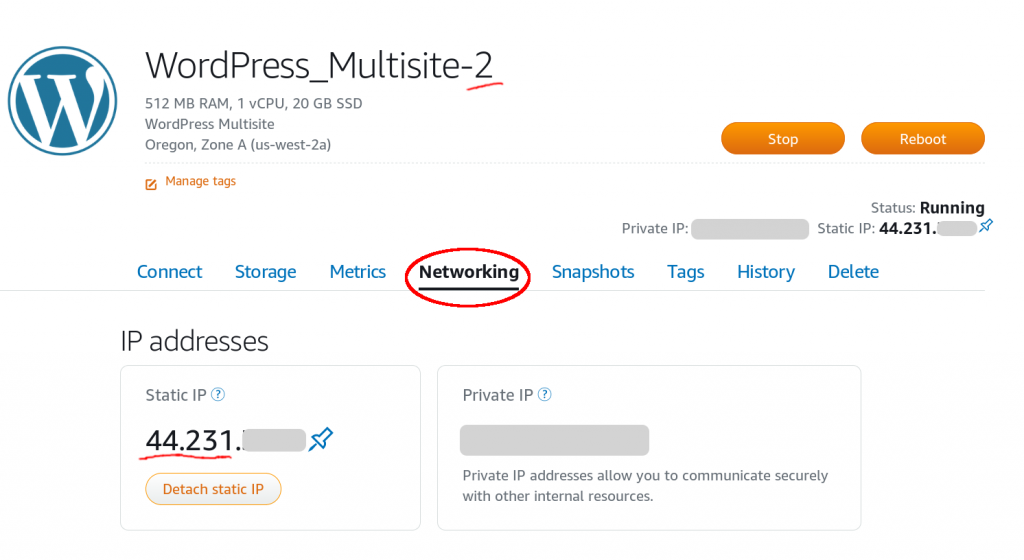
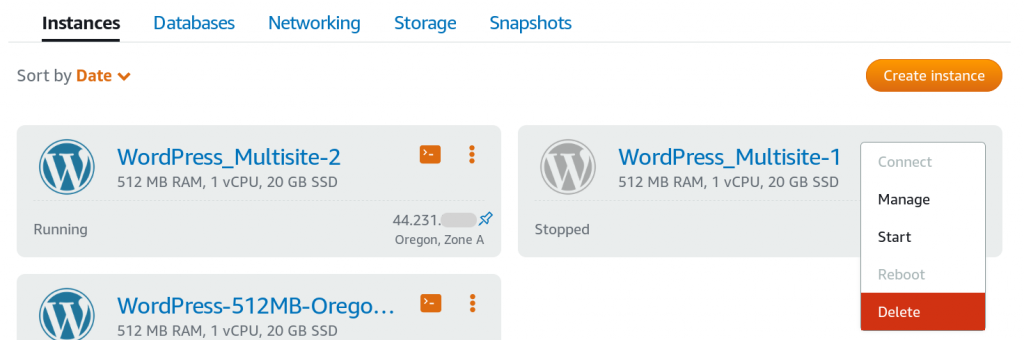
That’s pretty much it. The snapshot has been launched as a new instance, and is almost a verbatim copy of the old instance. Almost.